


How to create a voice assistant: important prerequisites.
Before starting a voice project, which you are surely about to do if you are reading this article, it is necessary to prepare well in advance. Indeed, to create a voice assistant or a voice interface, with or without VDK, one requires some methodology.
First of all, it is important to clearly frame the use cases that need to be developed in order to offer the most efficient and pleasant user experience for the user (whether an employee or an end customer). Defining these functionalities allows us to estimate the resources required (time, technologies…) for their implementation.
Furthermore, the VDK is specialized in embedded voice assistants, so there are other parameters to anticipate. Firstly, this concerns the hardware that is planned to host the assistant. The storage capacity or the operating system will largely influence the necessary development. An embedded technology (also known as offline), unlike a Cloud one, relies entirely on its hardware to function, but not only that: the environment of use will also influence whether or not it is necessary to process the audio in case of noise pollution.
Now that you globally have all these elements in mind, we can tackle the creation of your use cases for the embedded voice assistant you need. Thanks to the Voice development Kit (VDK), only 5 steps are required to have an already operational solution, very quickly.
Step 1: Start the VDK to create a project and download the necessary resources.
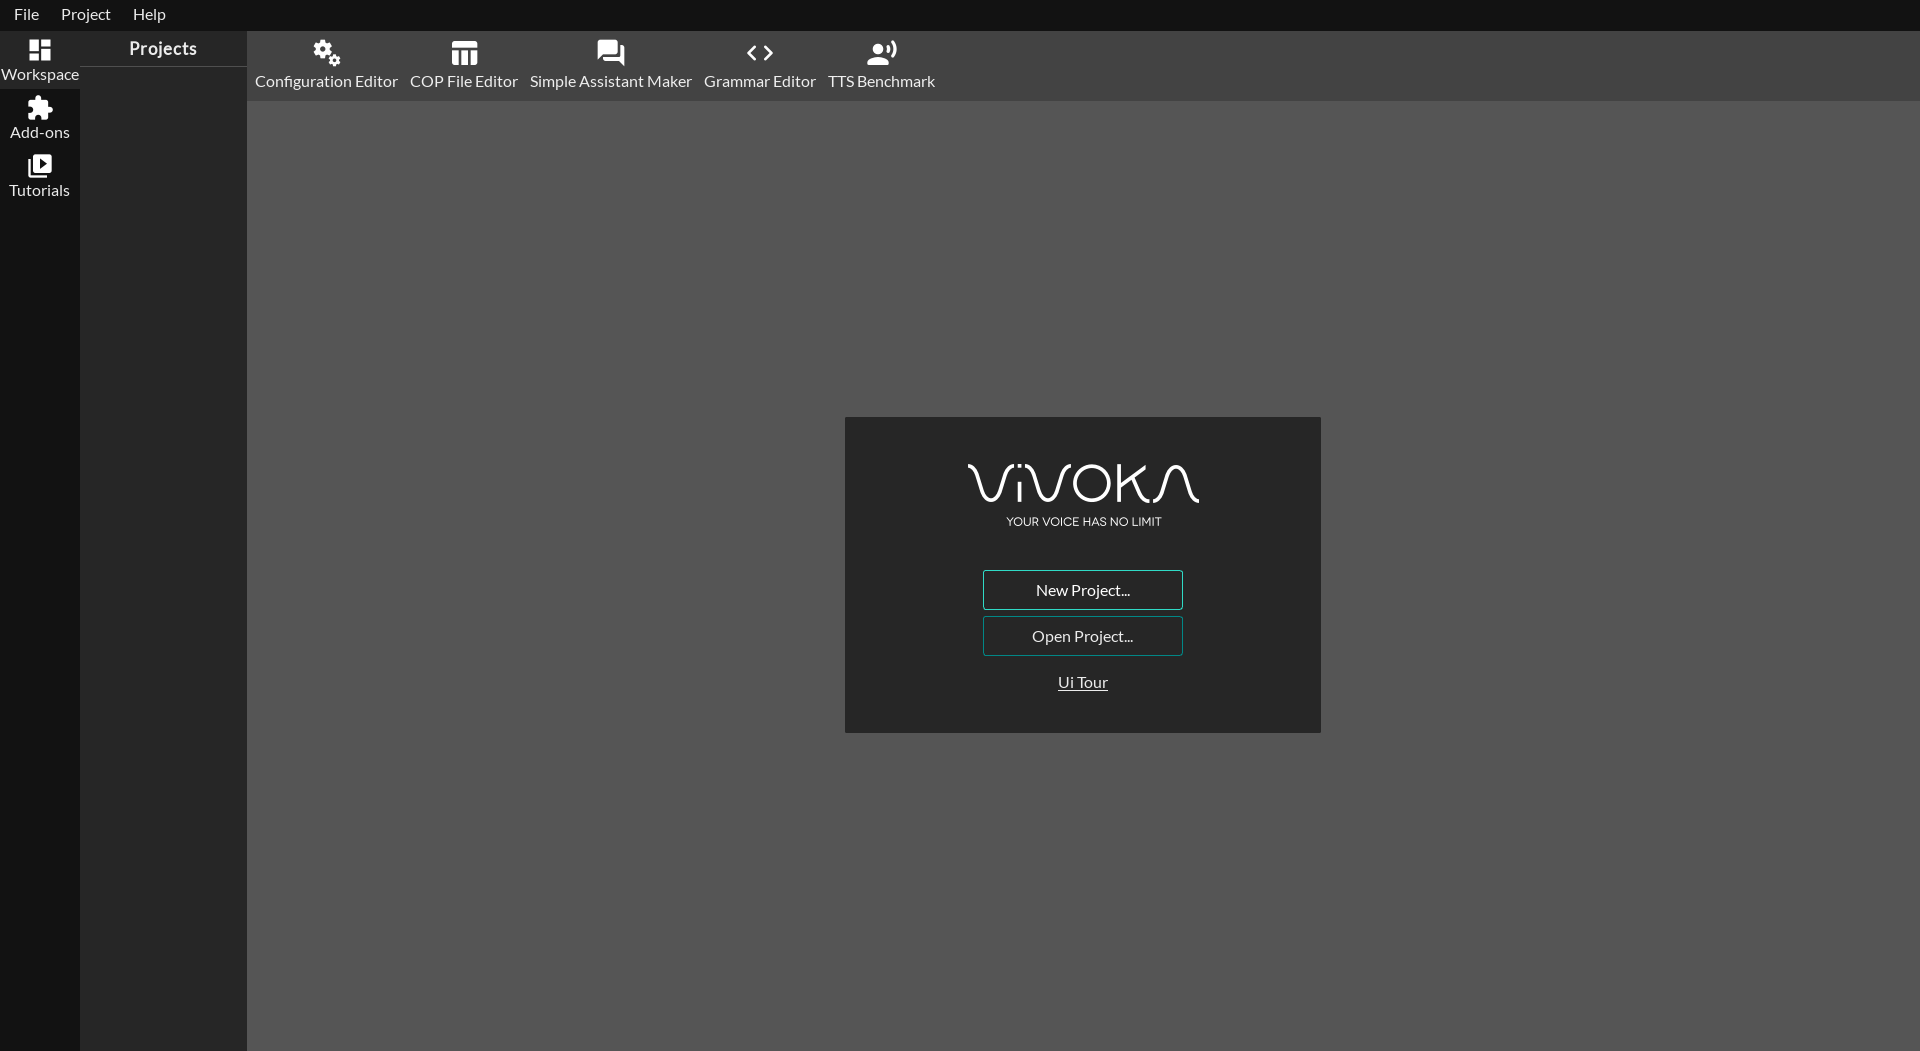
After launching the Voice Development Kit, the first view is the workspace view. In this space you have different possibilities: create a new project, open an already existing project or access the interface presentation (guided tour below).
For this tutorial we will choose a basic wizard (characterized by the use of the Simple Assistant Maker widget) in English language. Indeed the tool allows to show quickly and easily the power of the VDK, although the customized part is more complete and adapted to advanced use cases for embedded applications.
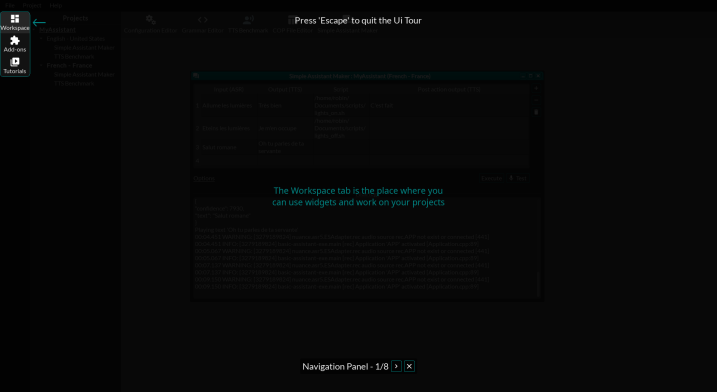
This presentation, which we call “Guided tour”, allows in a few steps to cover the main elements of the interface about their respective locations and usage. This is an important step for first-time users because the tool, although easy to use, has mechanics that it is best to become familiar with before proceeding.
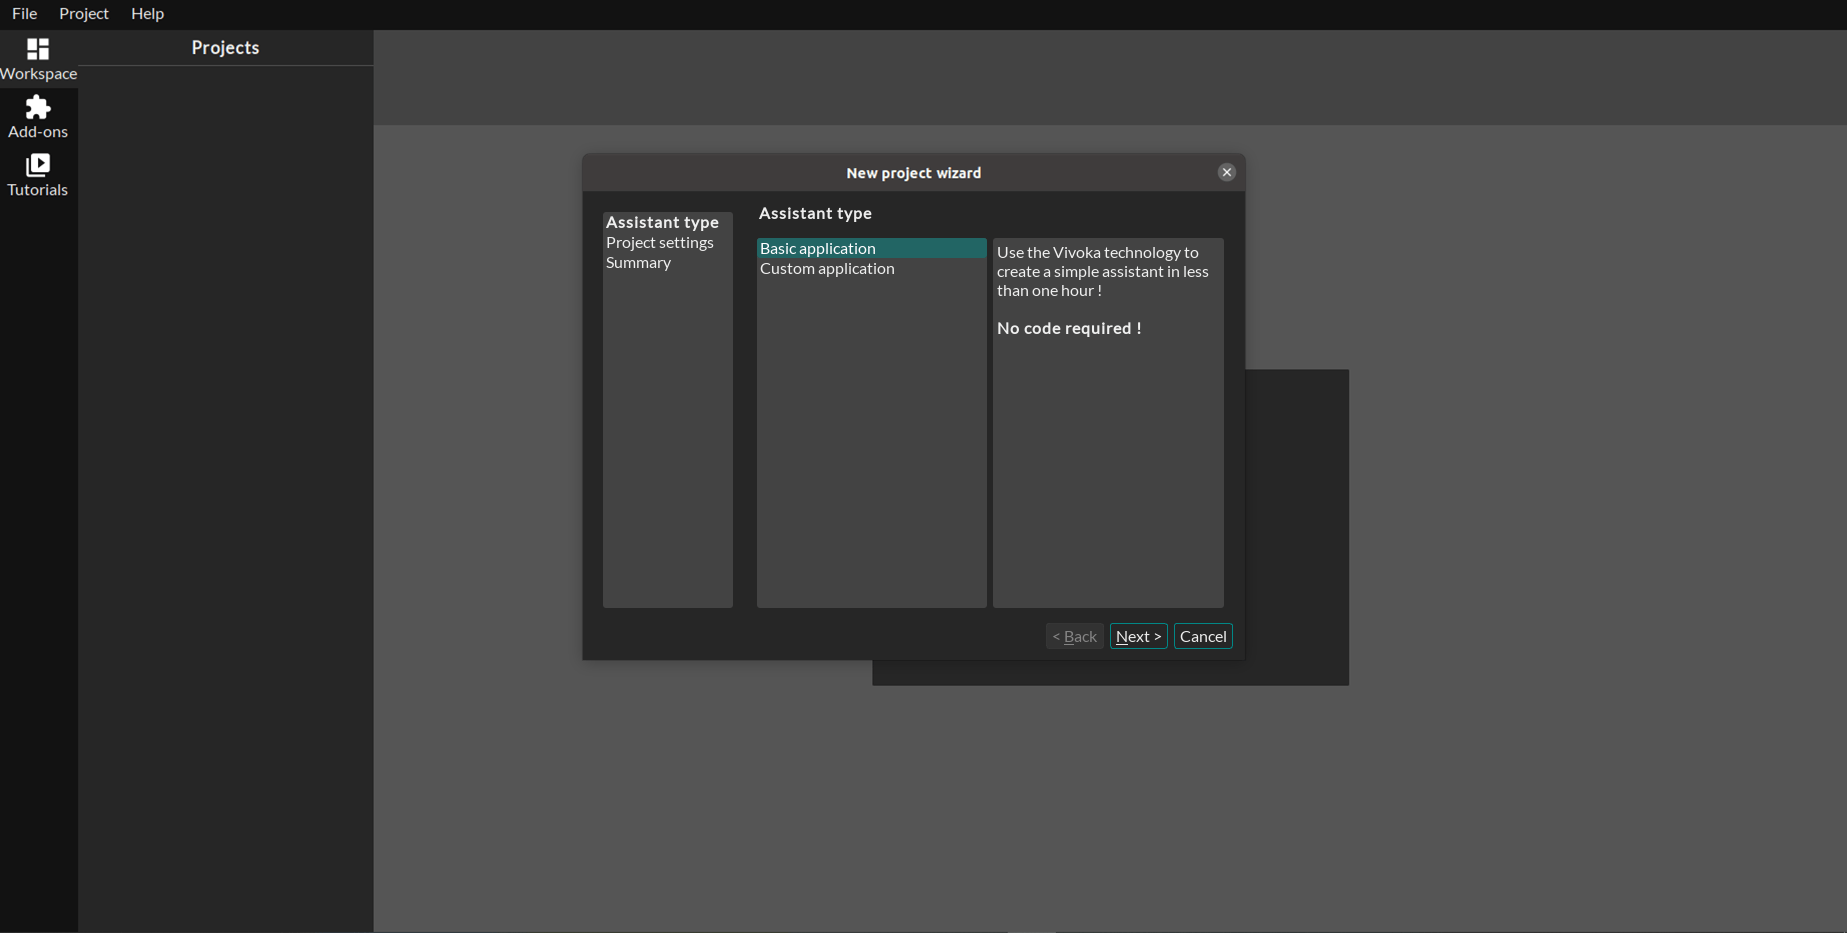
Let’s go back to the first view presenting the choice between creating and opening a project. In our case, we are going to create a new project and choose “basic application” in order to focus on the use of SAM. Once the selections have been made, a folder is automatically created in which the project files will be grouped.

Step 2: Open SAM to create a voice assistant query
We’ve been talking about SAM since the beginning, now it’s time to use it. The Simple Assistant Maker is a tool created by Vivoka to quickly and easily produce voice use cases that include a user request, responses by the assistant and the execution of an action (here through a script). When you choose “basic application”, this widget is automatically downloaded to be added to the workspace.
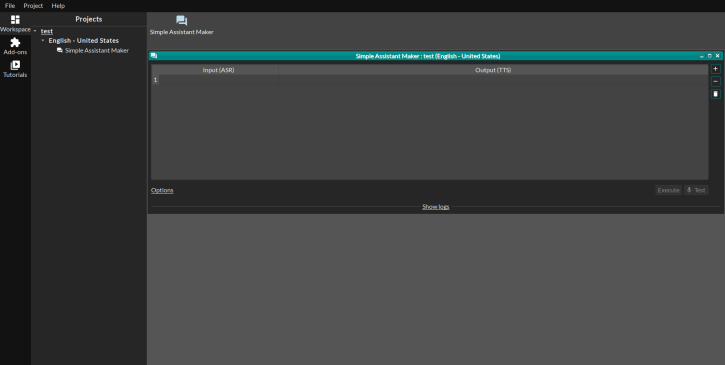
Once the plugin is dragged on the workspace you will have a window in the form of a table with 2 visible columns:
- “Input (ASR)” = the request submitted to the assistant.
- “Output (TTS)” = the response given by the system.
In addition to these first two fields filled in, other columns can be added such as:
- “Script” = the action to be performed.
- “Post action output (TTS)” = the notification given after the action performed.
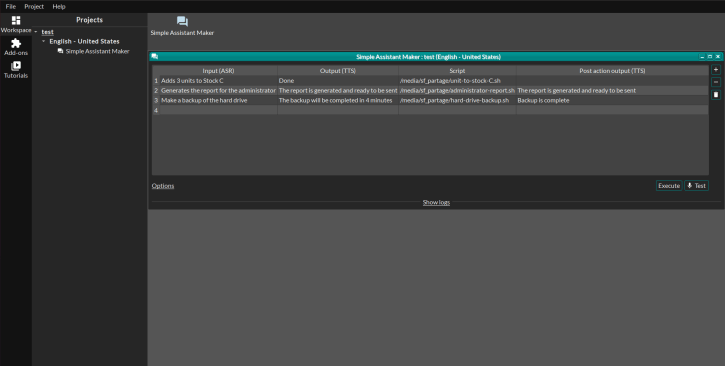
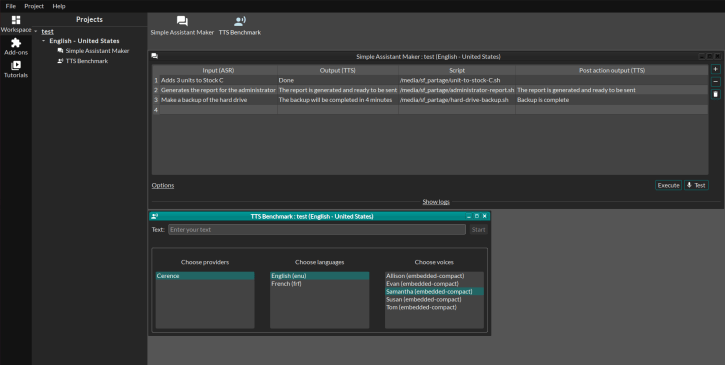
As an example, we will choose the following queries:
- “Adds 3 units to Stock C” with “Done” response and an action script.
- “Generates the report for the administrator” with the response “The report is generated and ready to be sent” and an action script.
- “Make a backup of the hard drive” with the first response “The backup will be completed in 4 minutes”, an action script and a final response “Backup is complete”.
This, once in SAM, gives us the following:
Scripts are to be created outside the VDK and associated in the SAM interface. Once you have completed the SAM table, you have the possibility to run the creation of the wizard and then test it. To do this, you need to have a microphone as audio input and to configure a TTS voice for the outputs. To do this, continue to step 3.
Step 3: Evaluate and choose the different voices with TTS Benchmark
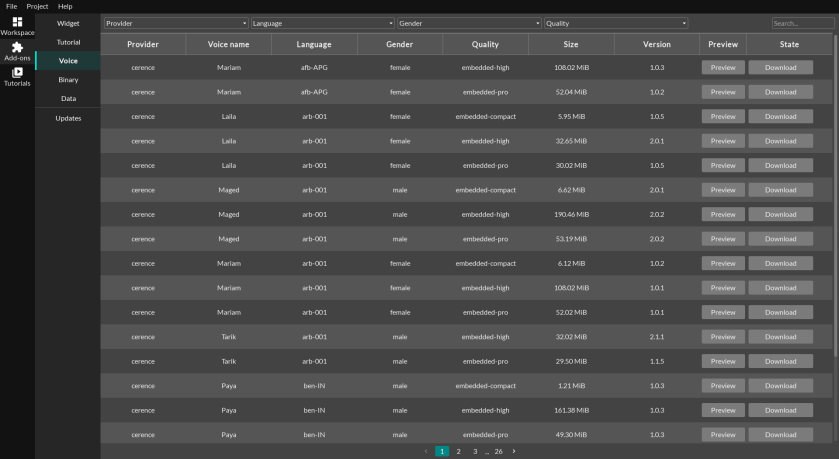
The Voice Development Kit contains a large bank of voices for speech synthesis. These are contained in the add-ons section and the sub-category “voices”. Ranked by supplier, genre, language and quality, the different voices are downloadable to be integrated into your projects to create a voice assistant.
In order to try out the numerous voices available, outside the default phrase in the catalog, the VDK has an ideally designed plugin: the TTS benchmark. It allows you to compare the different voices downloaded between languages, suppliers, genre and quality. All you have to do is give an example sentence and compare the different renditions. Once chosen, these voices can be selected in SAM via its options.
Step 4: Test and Correct Project Elements
Now that the queries and scripts are configured, and the chosen voice is the right one, all it remains is to execute and test the queries from SAM. This is the step just before the export, so it is important to make sure that the result really corresponds to the expectations.
It is also the opportunity to simulate the desired experience via the voice wizard and possibly complete it. Indeed, the configuration is already done, all that remains is to add the different elements (input, output, script and possibly post action output) to create new use cases.
In case of an error during the execution of SAM, the details of the creation of the wizard are present in the logs part in order to correct it. It can be a missing element or a configuration problem to be corrected for example.
If everything suits your expectations, you just have to export it to integrate the embedded wizard in your devices. Go to the next step.
Step 5: Export Files for Integration
The last step of your embedded voice assistant is the export step. The export tool is opened in the menu bar of the Voice Development Kit, in “File” then “Export”. You will get this.
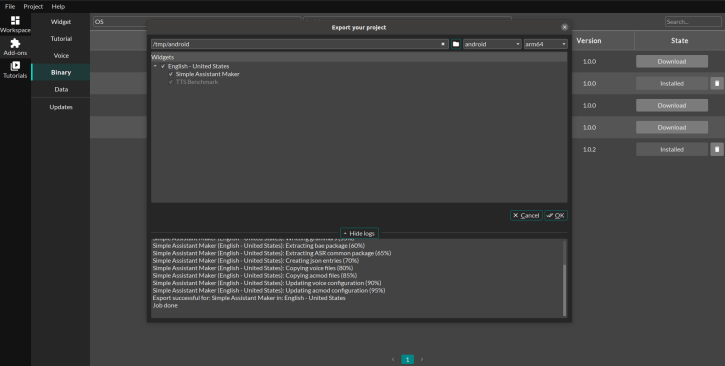
First of all, as in the creation of the project, it is necessary to choose a folder/location that will be used to host the exported project.
Right next to it, two options are displayed, from left to right: the desired operating system and the associated architecture. As a reminder, this is an embedded voice assistant, depending on the technical parameters of your hardware(s), make sure that the set is compatible!
In the main location is the detail of the project in use when you decided to export, it will be chosen by default. In our case, it will logically contain SAM and the TTS Benchmark. All exportable widgets will be chosen according to the previously chosen architecture, those that are not exportable will simply be disabled.
Once all the elements have been filled in and confirmed, the export can be launched. In case of problems, a log window (as on the previous preview) shows the details of the export process and points out the potential error(s).
The Voice Development Kit, a miracle solution for creating an embedded voice assistant?
At the end of these 5 steps, you have an embedded voice assistant ready to be used in your devices. In our case, about 60 minutes were needed to create the assistant and integrate it. Obviously, depending on the complexity of your project, this time will evolve.
This efficiency and ease to develop embedded voice interfaces comes from the Voice Development Kit (VDK). This SDK with graphical interface allows any company and any developer to create and configure an offline voice assistant composed of one or more technologies (transcription, synthesis, grammar management…) in record time.
Why use the Voice Development Kit?
Why not use the VDK precisely? It is the only tool available today, specialized in embedded voice. In addition to making development much easier, it saves time on the various processes in order to offer the best possible deliverability.
This time can easily be reported in human resources which costs the company a lot internally, as much as outsourcing the project to a company. Normally, the proposed voice solutions are rarely adapted to business constraints. It is therefore very often necessary to adapt the technology and this has a cost, especially since the guarantees of an operational solution are not high.
The VDK has been designed with these issues as the first point of pain to resolve. For this reason, it offers an intuitive use and an important autonomy to the companies, for a reduced cost compared to the result offered.
Today the Voice Development Kit is a specialized tool for embedded voice technologies. Tomorrow, it will continue to evolve to offer new technologies, new add-ons and always more ease to create your voice assistants.
Which fields of activity are concerned?
The fact that the Voice Development Kit is a general-purpose software allows all companies to use it. Indeed, it does not originally have a business specialization, although the tools available allow us to customize the use cases in order to adapt them to the reality of our clients.
Thus, whether in logistics, robotics, IoT or specialized industry, there are no barriers to using VDK to create a voice project.